Tutorial Part 1: The Beginning of a Tweets App
Introduction
This tutorial covers many practical aspects of developing desktop-like qooxdoo apps. It is set up as a series of tutorials that go beyond the must-read "Hello World" tutorial. For even more samples of app code you can check the demo applications included in the framework, for instance the Feedreader.
As the headline of this tutorial says, we are building a simple tweets application. identica is a twitter-like service for reading and posting public short messages - called "tweets". It has a twitter-compatible API for accessing data.
Twitter itself made its authorization scheme more complex, as it starts requiring OAuth even to read public tweets. For this basic tutorial it would be too complex to handle such advanced authorization. If your are interested in OAuth, check out how you could handle that in a qooxdoo app by looking at the Github demo.
The following mockup shows you how the application should look like at the end.
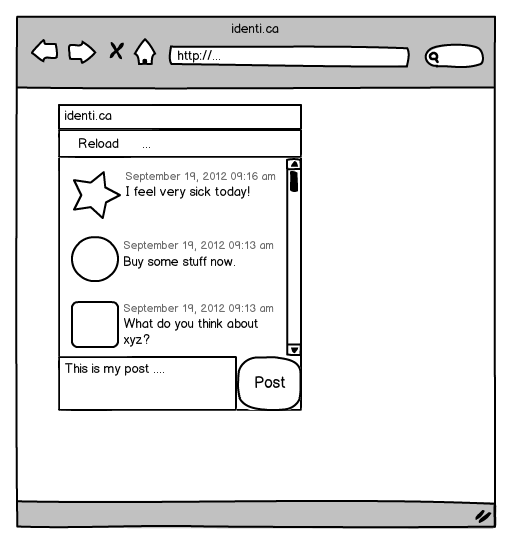
If you take a closer look at the mockup, you see a window containing a toolbar, a list, a text area and a button to post messages. This should cover some common scenarios of a typical qooxdoo application.
In the first part you'll learn how to create a new application and how to build a part of the main UI. But before we get started, be sure you looked at the "Hello World" tutorial. We rely on some of the fundamentals explained there.
Getting started
The first step is to get a working qooxdoo application where we can start our development. You should already have the qooxdoo SDK and know how to use create-application.py, so we just create an application called tweets.
create-application.py --name=tweets
After that, we should check that everything works as expected. Change the directory to tweets and run ./generate.py. Now the skeleton application is ready to run and you can open the index file located in the source directory. After that, open the Application.js file located in source/class/tweets/Application.js with your favorite editor and we are set up for development!
You should see the unchanged skeleton code of the application containing the creation of a button. We don't need that anymore so you can delete it including all the listener stuff.
The first part is to create a Window. As the Window contains all the UI controls, we should extend from the qooxdoo Window and add the controls within that class. Adding a new class is as easy as creating a new file. Just create a file parallel to the Application.js file named MainWindow.js. Now it is time to add some code to that file. We want to create a class so we use the qooxdoo function qx.Class.define for that. Add the following lines to your newly created file.
qx.Class.define("tweets.MainWindow",
{
  extend : qx.ui.window.Window,

    construct : function()
    {
      this.base(arguments, "tweets");
    }
});
We have created our own class extending the qooxdoo Window. In the constructor, we already set the caption of the window, which is the first constructor parameter of the qooxdoo window. So you already have guessed it, this.base(arguments) calls the overridden method of the superclass, in this case the constructor. To test the window, we need to create an instance of it in the main application. Add these two lines of code in the Application.js file to create and open the window. Make sure to add it at the end of the main function in the application class.
var main = new tweets.MainWindow();
main.open();
Now its time to test the whole thing in the browser. But before we can do that, we need to run the generator once more because we added the window class as new dependency. So run ./generate.py and open the page in the browser. You should see a window in the top left corner having the name "tweets".
Programming as Configuring
The last task of this tutorial part is to configure the window. Opening the window in the left corner does not look so good, so we should move the window a bit away from the edges of the viewport. To do this add the following line to your application file:
main.moveTo(50, 30);
Another thing we should configure are the buttons of the window. The user should not be able to close, minimize nor maximize the window. So we add the following lines of code in our window constructor.
// hide the window buttons
this.setShowClose(false);
this.setShowMaximize(false);
this.setShowMinimize(false);
The last thing we could change is the size of the window on startup. Of course the user can resize the window but we should take care of a good looking startup of the application. Changing the size is as easy as hiding the buttons, just tell the window in its constructor:
// adjust size
this.setWidth(250);
this.setHeight(300);
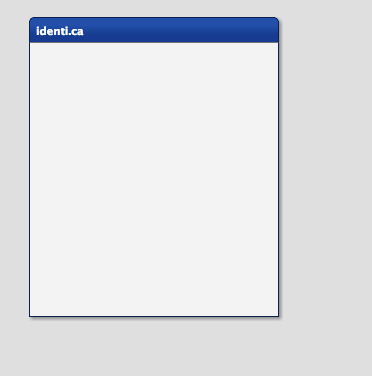
At this point, your application should look like this.
That's it for the first part. If you want to have the code from the tutorial, take a look at the project at Github and just fork the project. The next part of the tutorial will contain the building of the other parts of the UI. If you have feedback or want to see something special in further tutorials, just let us know!